
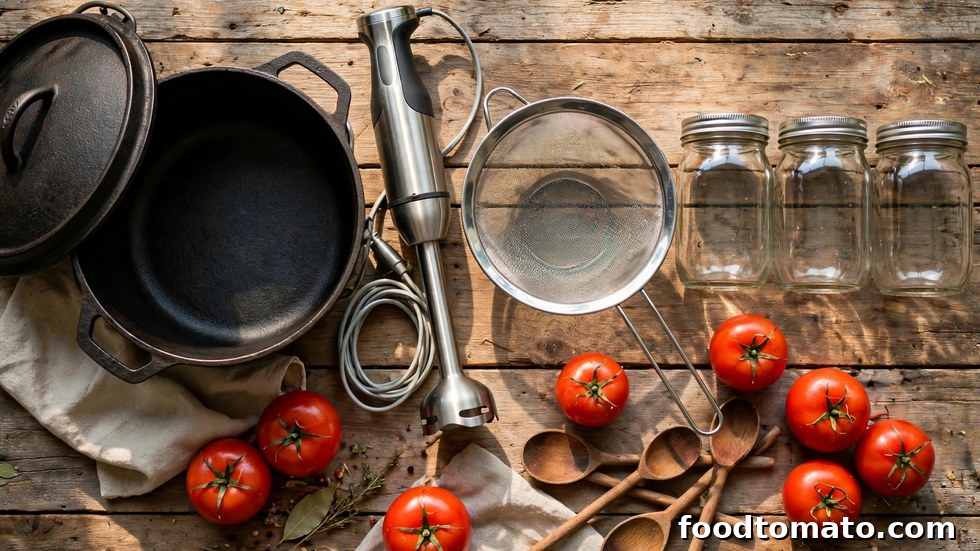
You do not need a professional kitchen to make outstanding ketchup — but the right tools make the process faster, easier, and far more consistent. The wrong pot can scorch your batch; the wrong strainer leaves your ketchup gritty; and trying to blend hot sauce in an open blender is a lesson you only want to learn from reading about it. This guide covers every piece of equipment that matters for homemade ketchup, from the absolute essentials to the nice-to-have upgrades, with honest advice on what is worth buying and what you can skip.
The Essentials: What You Truly Need
Four tools do 90 percent of the work. If you own these, you can make excellent ketchup today with no shopping trip required.
Heavy-bottomed pot or Dutch oven
This is the single most important piece of equipment. A heavy-bottomed stainless steel saucepan or an enameled cast-iron Dutch oven distributes heat evenly and prevents the scorching that ruins ketchup. For a small batch (2 pounds of tomatoes), a 3 to 4-quart pot is ideal; for double batches, go 6 quarts or larger. Avoid thin, lightweight pots — their hot spots will burn the sugars during the final reduction no matter how carefully you stir.
Fine-mesh sieve
A sturdy fine-mesh strainer is what turns rough tomato purée into silky ketchup, removing seeds, skins, and spice grit in one pass. Choose one large enough to hold at least 2 cups at a time — a 7 to 8-inch sieve is a good all-rounder. Pair it with a flexible spatula or the back of a ladle to press the purée through efficiently.
Immersion blender
An immersion (stick) blender lets you purée the hot tomato mixture directly in the pot — no transferring boiling liquid to a countertop blender, no batches, no mess. It is faster, safer, and easier to clean. Any basic model works; you do not need variable speeds for ketchup. If you only buy one new tool for this project, make it this one.
Glass jars with tight lids
Ketchup’s acidity can react with metal and stain plastic, so glass is the ideal storage vessel. Mason jars, repurposed jam jars, or squeeze bottles all work — just make sure lids seal tightly. Pint-size (16 oz) jars are perfect for a standard small batch. Wash jars in hot soapy water and dry completely before filling.
Highly Recommended Upgrades
These are not strictly required, but each one solves a real annoyance and is worth the modest investment if you plan to make ketchup more than once.
- Food mill: The classic ketchup tool. A food mill purées and strains in a single step — crank the handle and smooth sauce comes out one side while seeds and skins stay behind. Faster than blending plus sieving for large batches, and it produces an exceptionally smooth texture.
- Splatter screen: Simmering ketchup bubbles like a mud pot and spatters everything within a foot. A mesh splatter screen laid over the pot lets steam escape while keeping your stovetop clean.
- Instant-read thermometer: Useful for confirming your simmer stays in the safe zone and for checking jar sterilization water temperature if you process jars. Not essential, but handy.
- Kitchen scale: Tomatoes vary wildly in size, so weighing them (2 lbs per small batch) is far more accurate than counting. A scale also makes scaling recipes up or down foolproof.
- Canning funnel: A wide-mouth funnel makes transferring finished ketchup into jars clean and drip-free. Once you use one, you will never pour freehand again.
Nice to Have (But Skippable)
- High-powered countertop blender: Produces an ultra-smooth purée, but requires blending in batches with careful venting of hot liquid. An immersion blender is simpler for ketchup.
- Slow cooker: Excellent for hands-off reduction — cook the seasoned purée on low with the lid ajar for 6-8 hours. Slower than the stovetop but nearly impossible to scorch.
- Cheesecloth: Useful for bundling whole spices into a sachet and for an extra-fine final strain. A fine-mesh sieve alone is sufficient for most batches.
- pH test strips: Only needed if you plan to water-bath can ketchup for shelf storage. For refrigerator ketchup, standard vinegar amounts are reliably safe.
Equipment Comparison at a Glance
| Tool | Priority | What It Does for Your Ketchup |
|---|---|---|
| Heavy-bottomed pot / Dutch oven | Essential | Even heat; prevents scorching during reduction |
| Fine-mesh sieve | Essential | Removes seeds, skins, and grit for silky texture |
| Immersion blender | Essential | Purées hot mixture safely right in the pot |
| Glass jars with lids | Essential | Non-reactive storage for acidic ketchup |
| Food mill | Recommended | Purées and strains in one step |
| Splatter screen | Recommended | Keeps stovetop clean during simmering |
| Kitchen scale | Recommended | Accurate tomato and ingredient measuring |
| Canning funnel | Recommended | Clean, drip-free jarring |
| Slow cooker | Optional | Hands-off, scorch-proof reduction |
What You Do Not Need
Save your money on these. A dedicated tomato press is overkill unless you are processing bushels. Special “ketchup bottles” with narrow necks look charming but are harder to fill and clean than wide-mouth jars. And you do not need a pressure canner — refrigerator ketchup stored properly keeps for weeks, and freezer storage covers longer-term needs. The beauty of homemade ketchup is its simplicity; the ingredient list is short and the equipment list should be too.
Setting Up Your Workspace
Before you start cooking, arrange your station. Put the pot on the stove, set the sieve over a large bowl near the pot, keep the immersion blender plugged in nearby, and have your jars washed and ready. Measure all spices into a small bowl in advance — once the reduction starts thickening, you will be stirring too often to measure anything. This fifteen minutes of setup prevents the frantic mid-cook scrambling that leads to scorched bottoms and forgotten ingredients.
Frequently Asked Questions
Can I make ketchup without an immersion blender?
Yes. A countertop blender works — let the mixture cool for 10 minutes first, blend in small batches, and vent the lid by removing the center cap and covering it with a folded towel to release steam safely. A food mill or even a potato masher followed by thorough straining can also work, though the texture will be slightly more rustic.
Is a Dutch oven really better than a regular pot?
For ketchup, yes. Enameled cast iron holds heat remarkably evenly and its heavy lid is useful during the initial softening stage. That said, any heavy-bottomed stainless steel pot performs well. The key attribute is thickness at the base — that is what prevents scorching, regardless of brand or material.
What size jars are best for storing ketchup?
Pint (16 oz) jars suit a standard small batch perfectly, leaving you with one full jar and a little extra. Wide-mouth jars are easier to fill and clean than narrow-neck bottles. For serving, a squeeze bottle with a cap keeps things tidy at the table — just refill it from your storage jar.
Do I need to sterilize jars for refrigerator ketchup?
Full canning-level sterilization is not required for ketchup stored in the refrigerator and eaten within a month. Just wash jars and lids in hot soapy water, rinse well, and dry completely. Cleanliness still matters — always use clean utensils when serving to avoid introducing bacteria.
Key Takeaways
- You only truly need four tools: a heavy-bottomed pot, a fine-mesh sieve, an immersion blender, and glass jars with tight lids.
- A food mill, splatter screen, kitchen scale, and canning funnel are the upgrades most worth buying for regular ketchup makers.
- Skip the specialty gear — no tomato press, pressure canner, or narrow-neck bottles required for great homemade ketchup.
- Set up your workspace before cooking: measured spices, sieve over a bowl, and clean jars ready prevent mid-cook mistakes.
With the right tools on your counter, homemade ketchup goes from project to pleasure. Gather your essentials, set up your station, and cook your first batch this weekend — you will be amazed how much easier the process feels with proper equipment. Then explore our recipe and troubleshooting guides to make every batch better than the last.